Building my first Guitar from scratch
There has always been a part of me that wanted to build a guitar but I have never had the confidence to do so and the pull of a busy job also kept me away from considering it. But I figured that ‘why not’ and have started to build a Tele style guitar from scratch.
Here are my goals overall:
- Don’t succumb to the desire to get the best of tools, especially considering that I am an absolute beginner
- Attempt to learn as much as possible through the Internet
- Build as much by hand as I possibly can (not electronics)
- Document my wins, failures and lessons
Wood
I’m new to the woodwork and luthiery game, so I decided that I wasn’t going to go ahead and buy the most expensive/book matched pieces of timber that I could find, because I know that there are going to be mistakes along the way that may not do justice to an expensive piece of timber.
So I went down to the local recycled timber yard and I have picked up some local (reclaimed) Blackbutt for the body and some Spotted Gum for the neck. I most probably would do this again if I am being honest, more below.
Tools
- Irwin Handsaw
- Second hand No 4. Record Plane
- Ozito Multisander
- A ton of sandpaper and elbow grease
- 30cm bar clamps
- 4 cheap spring clamps
The Build so far
I got the plans off the Electric Herald website and have printed them to 1:1 scale (instructions on website) and then carefully pasted the body parts together and stuck it to a piece of MDF that was then cut to size around the template
By the time that I has done the above, I had cut lengths of Blackbutt to approximately 40cm long and 8cm wide. It took 4 pieces to make the ~32cm wide blank for the body. I used the Carpenters triangle marking trick to mark out what sides fit closest to each other and then attempted to get them true. This was a mission, as without a bandsaw with a guide or a jack/jointer plane it is pretty hard to get hardwood to comply. So I used a time honoured method – elbow grease and weeping. I used a mix of a Size 4 plane (which I bought second hand) and sanding with a sheet sander. After a lot of work, I had the pieces fitting together. Side note – I had the pieces fitting together AFTER I accidently wiped off most of the carpenter’s triangle by friction (and aforementioned tears) and had to work out what was what.
Glue up with PVA and clamps was the most straight forward part of the process. I did underestimate the dry time on a cool day and tried to start to work again, which set me back a day or two.
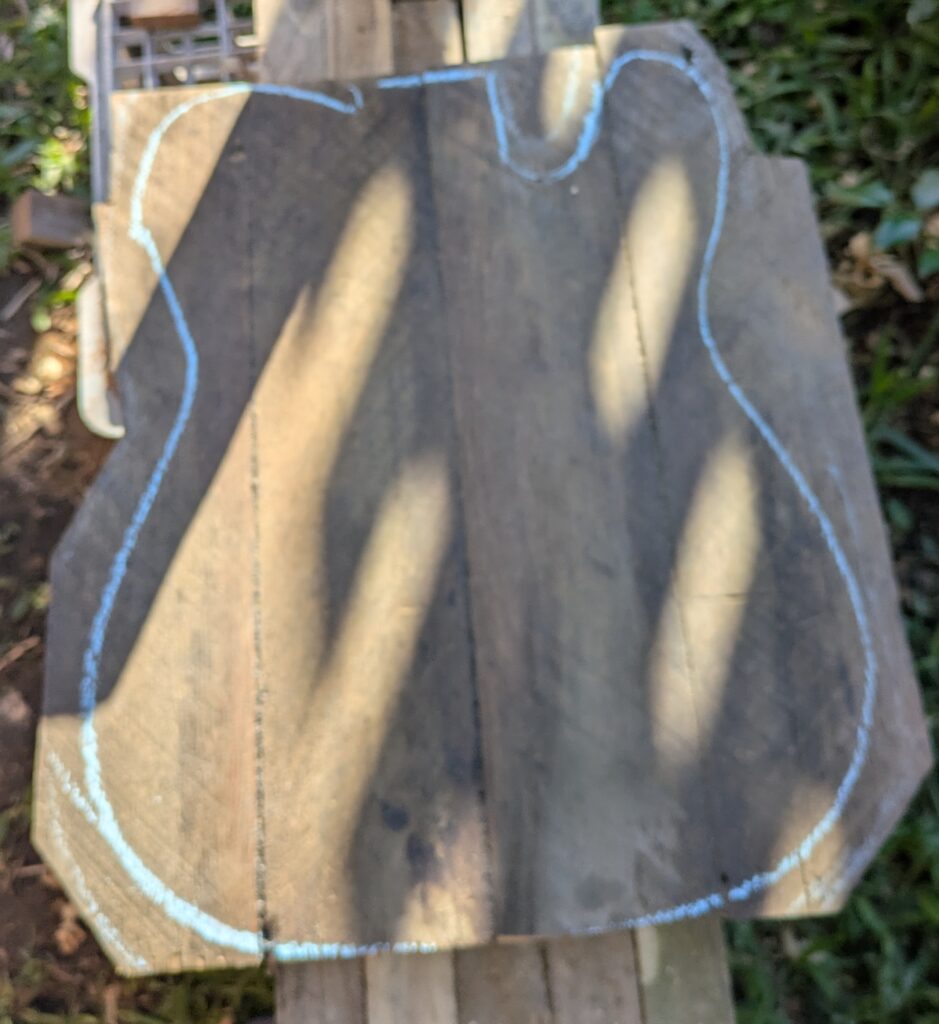
Next step was the template which I attached with some spring clamps and traced around. Given that I know how new to this I am, I traced it with about 2cm extra width so that I could be prepared for mistakes and also any change in strategy that occurred to me.
Lessons so far
Blackbutt is heavy, like heavy heavy and is a hard wood to cut and work with. But I have committed to it at this stage.
Issues I have had:
- I don’t have a power saw, so anything is rough cut by hand.
- I don’t have a jointer plane(or saw) that can get edges just right for fitting together for a blank.
- 30cm bar clamps don’t fit across body blank that is a bit over 30cm wide.
- The depth of the timber is too deep and needs depth off for weight relief – I stupidly did not do that prior to gluing up.
What I am going to need
This is one of those ever moving lists – some things I have realised I can do by hand, others I have realised are just foolhardy to try to do, unless I want to spend days sanding something that could easily be done in minutes.
Top of the list for things I am going to need:
- Router – hand tools for the precision work of cutting pickups are expensive and I trust my current skills less than I do a piece of metal spinning at several thousand RPM
- Bandsaw – I don’t think I am going to need anything huge (for resawing etc) but I am going to need a way to: get a straighter edge quicker, cut to length, rough cut the blank
Next up – Turning a Block to a Blank


Recent Comments